Table of Content
Some ways to get the model is to make it yourself or try to buy it at a store. For example, say you want to make a mold of a dogbone. Well, you can make a dogbone shape out of polymer clay, or you can just use a real dogbone or buy a plastic dog toy. When the back of the mold is smooth and even, gently tap the tray of chocolates on the countertop to pop any air bubbles. Prepare the plaster according to the package instructions. When the plaster is ready, pour it into the vaquform molds.
First, open a new document, and insert the chocolate that you have designed so far. Flip the chocolate so that the base is facing you, and draw a rectangle or square around the base of the chocolate using the Sketch tool. In this example, you’ll see I used a small measuring cup, but any appropriately-sized container will work. Add enough Plastique to make a layer about a quarter-inch thick.
Do silicone molds need to be greased when used for chocolate?
Pour store-bought silicone into the water and knead it for 5 minutes. Then, remove the silicone, press it into a disc, and mold it using your hands, special tools, or a shape like a car. Then, allow the silicone to set before cleaning and using it. Check that the chocolate has set before taking them out of the mold. Before trying to remove your chocolate pieces from the mold tray, make sure that they have properly contracted and dried. For clear molds, check the underside and make sure the chocolate doesn't look wet.
The great thing about them is they come in so many shapes and sizes that you are bound to find what you’re looking for. For this guide, we’ll be using fruit shaped magnets. They also have no deep areas and undercuts which are two of the most important factors to take in when preparing a tool for forming.
How to make silicone molds for chocolate?
What makes it even more exciting is that there are literally endless possibilities on what you can do with Vaquform. What we’ve shown you here is only the tip of the iceberg; the most basic of applications with the most basic of tools. From a flat one-part mold, you may figure out how to create more complicated, multiple part molds for 3D pieces and we tell you it literally does not end there. Repeat the same process of loading your plastic sheets, adjusting the material settings and placing the tools on the forming area. Note that there are no more magnets for your tools so they may shift positions from time to time during forming cycles or slight movements.

Allow the silicone to harden before removing the item and using the mold. Once you're happy with your piece, you'll need to bake it at 275F for 15 minutes to set. Fill each mold slowly with a squeeze bottle, spoon, or by pouring chocolate from a measuring cup.
Instructions to Make Chocolate Bar Molds
Afterward, the chocolate should be level with the surface of the mold. Check the ingredients to determine the chocolate type. Couverture chocolate contains cocoa liquor, cocoa butter, sugar, and vanilla. Lastly, if you don’t have a 3D printer, places like TechShop have the tools to turn your design files into physical objects, and staff the people who can show you how. Press the object firmly into the Plastique, until the back is flush with the top of the silicone. Let it set for at least an hour at room temperature.
You can use a bit of tape to keep them in place to prevent this. Once the temperature is set, press the center button until the orange button on the right starts to blink. This is the time to raise the sheet frame towards the heaters and place your forming tools in the forming area.
Step 3: Customize Your Chocolate
Once it’s completely mixed, press it over the top of the chocolate bar. I ended up using just half of the chocolate bar as I liked the look of the smaller bar of chocolate. How To Make Custom Food Safe Silicone Candy Molds Using Sorta-Clear™ 37In this video, we show how food-safe Sorta-Clear™ 37 silicone is used to make a mold for pouring candies. In this course you will pour your own chocolate bar and decorate it exactly how you like. While the bars cool, you will be guided through a chocolate tasting by one of our LINDT Master Chocolatiers.

Pinning this for later, because you never know when I might need it. I bought my silicone online from Make Your Own Molds . They have several different types, but what you’ll see in this tutorial is Silicone Plastique. Line the box with decorative tissue paper and put the chocolates inside. I chose to showcase my homemade chocolates in a gift box with a clear lid to give my valentine a sneak peek at these scrumptious bites. Be sure that you apply a coating that's thick enough so none of the mold is peeking through –– every nook and cranny should be coated in chocolate.
Two types of plastic that can be used are PETG and polycarbonate. PETG is much less expensive and is still very strong. Most professional chocolate molds are made of polycarbonate, but this material is very expensive and is more difficult to form. Many companies manufacture food grade silicone and it can be bought widely over the internet. Next, you will want to make copies of the model so you have one model for each cavity you want on the mold. Using the same example, if you want a mold with six dogbones, you will need six dogbones.

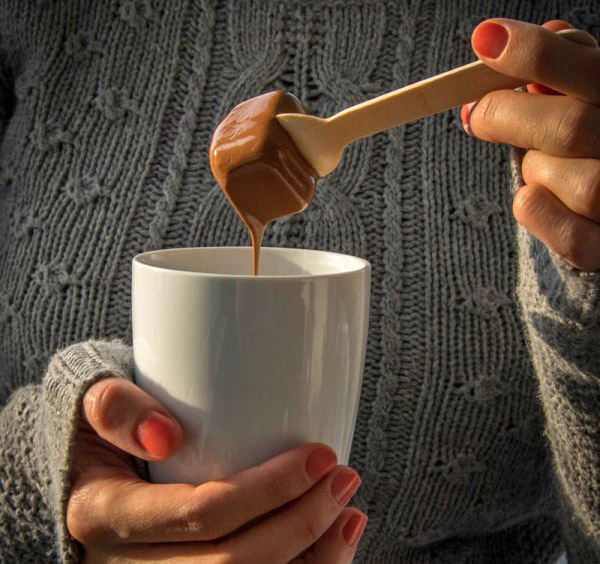
Using your spreader, add a small amount of melted chocolate to the molds one at a time. Then spread the melted chocolate so it coats the entire surface, taking care to spread the chocolate all the way up the sides of each mold. When melting your chocolate and coconut oil, you want it to be blended together very smoothly. To do that, make sure you're stirring the mixture between each 10-second microwave heating. At first, the chocolate may look like it's not melted yet, but once you start to stir you'll find that it actually is melted.
My suggestion is to consider making your own chocolate molds. It is really not that hard and doesn’t cost that much. To make intricate multicolored candies, buy different colors of confectionery coating and some small food-safe paintbrushes.


No comments:
Post a Comment